Anna goes to Las Vegas
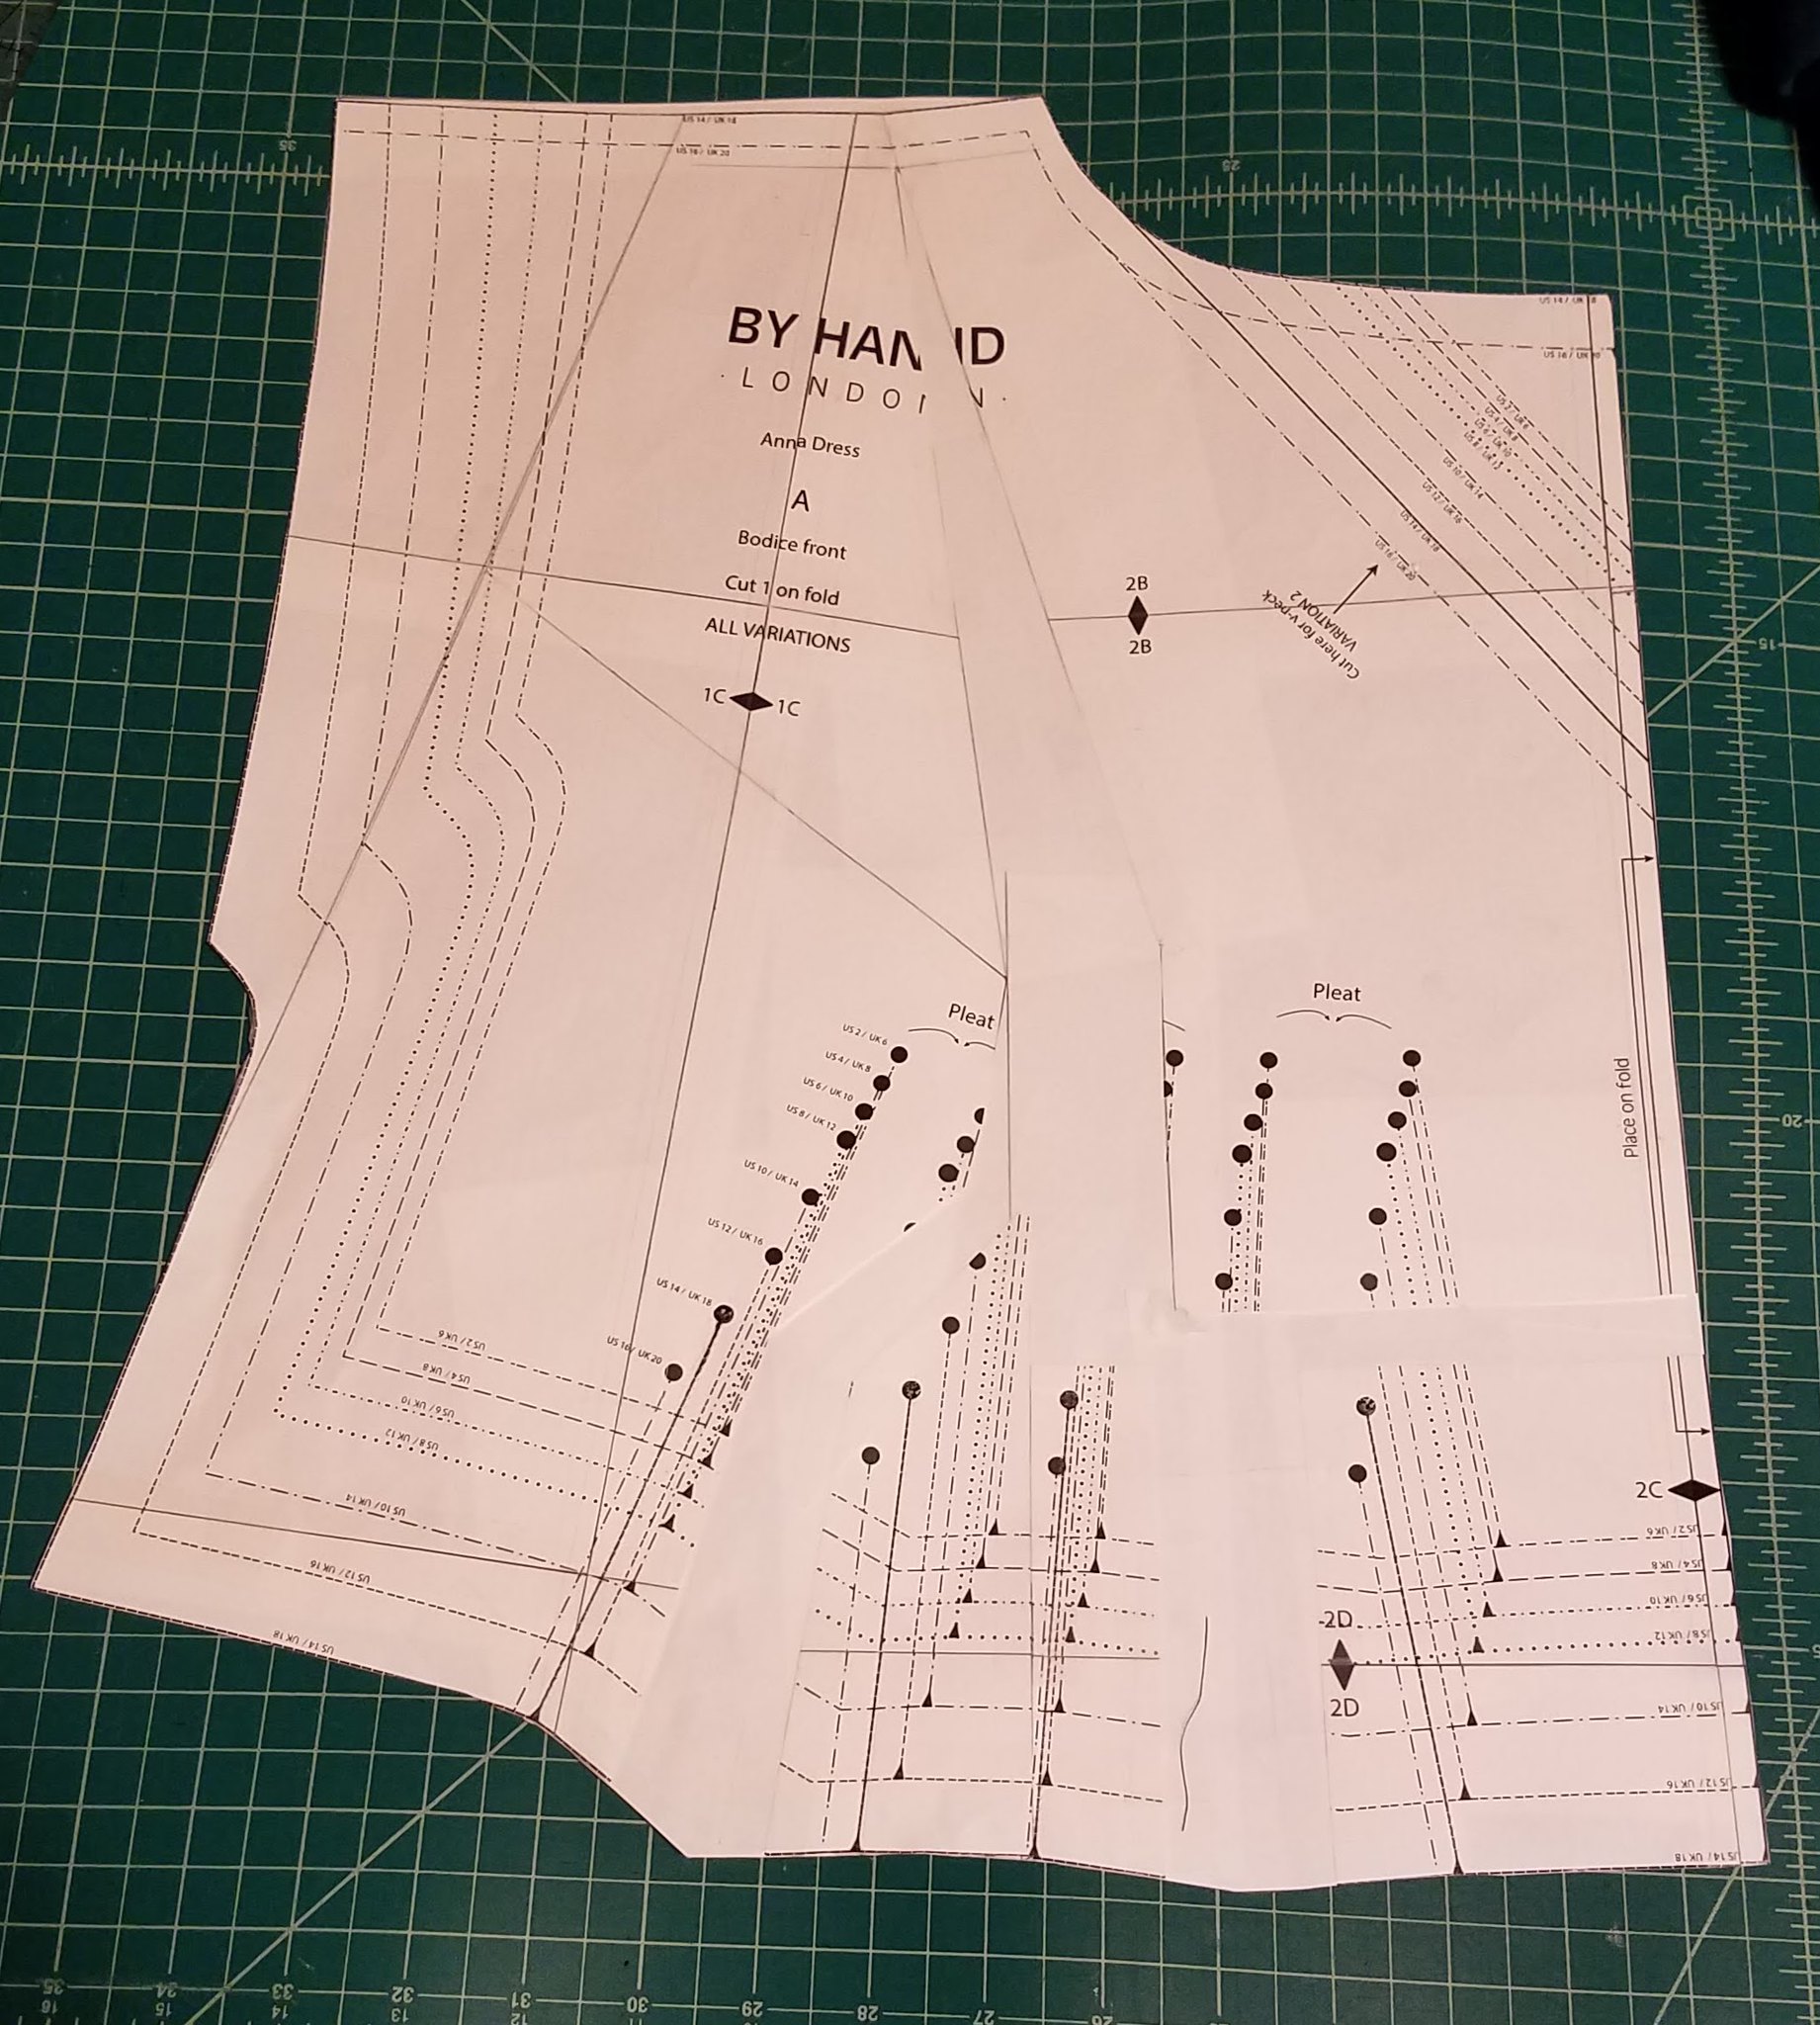
I have a special place in my heart for the By Hand London Anna. First of all, my daughter's name is Anna, so that alone would make me interested in taking a look at anything named after her. Plus, when it first came out, all the photos I saw were stunning. I've made 3 versions already and I was incredibly pleased with each one. So, when I needed a formal gown and didn't have a ton of time to mess with fitting, I decided to go back to my beloved Anna since already I knew the pattern pretty well. I wanted to add some extra drama, and I sketched up a couple quick silhouette options, including one with a neckline capelet and had decided to go that route.

Previously, I had to grade up a size to a ~US 18 and I didn't bother doing any other fit alterations. But I've lost a significant amount of weight since I last made an Anna, so this time around, I decided to make a size US 14 with a 3" FBA. I read up quite a bit on other ladies' experience with doing an FBA on Anna and decided to not do it the way the BHL blog recommends, since I was adding a large amount. I just used the normal Y method that I usually use, then rotated the dart and absorbed it into the two pleats, trying to distribute it equally. It's very hacky looking, but here's what the finished piece ended up looking like.
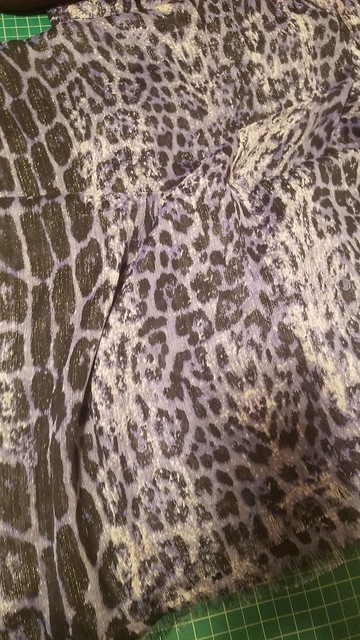
This dress was going to be for the awards dinner of a dance event and it is always a formal evening with a theme and this time the theme was Viva Las Vegas. I had this periwinkle/black/white shimmery animal print crinkle chiffon fabric that was gorgeous and just screamed Vegas to me. So, I decided I had to go with it.
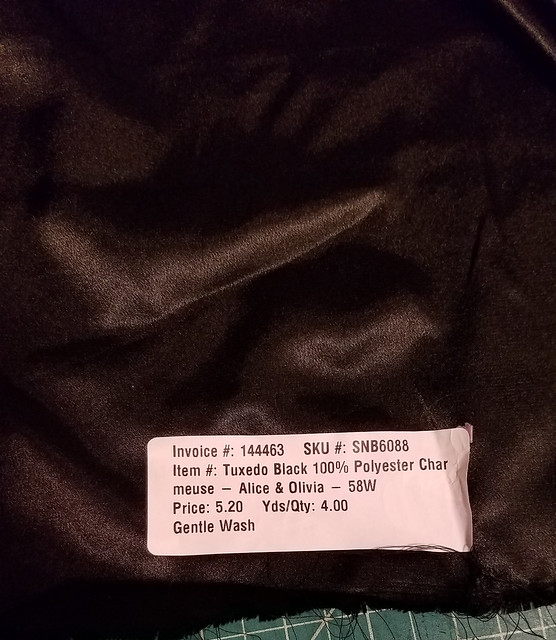
The fabric was too transparent, so I looked through my stash and I found a black charmeuse satin to underline it with.
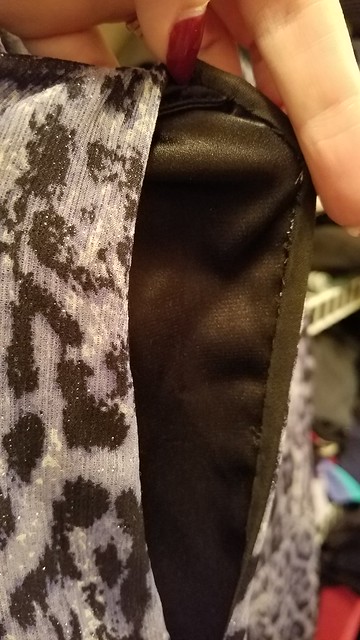
I thought the shiny side would feel nice against my skin, so I put the fabrics wrong sides together and I cut them together and cut a single layer -- not on the fold. I also hand basted the fabrics together to keep the chiffon from shifting around too much and I'm really glad I took the extra effort to do so. It made it so much easier once I started sewing all those skirt pieces together! I made cut and sewed up the bodice first and I finished the arm holes with black packaged bias binding, hand stitching it to the underlining layer only, instead of turning and sewing the edges in place as the instructions direct. This is the first time I've done it this way, because I usually line my Anna bodice and I also have always added sleeves before, but I really like how clean this method came out.
After I made up the bodice, with the neckline unfinished, waiting for the capelet, I put it on my dressform and was looking at it sitting there, already second guessing my plan. I was chatting with a friend/coworker who was working late out of town and sent some photos, she didn't agree with my plan either, so I started thinking of other ways I could add some extra drama to the dress. I started thinking about cutting a V back and draping some long flaps from the V to create a little back cape thing (yes, I REALLY want a dress with a cape of some sort!!) and so I unpinned the back of the bodice to see what it would look like with a V back....
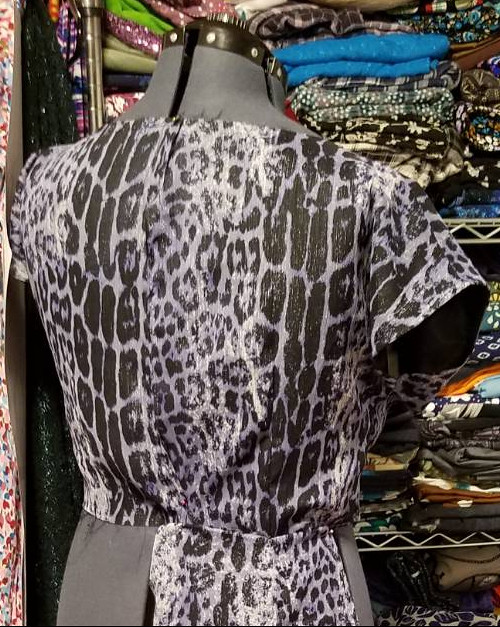
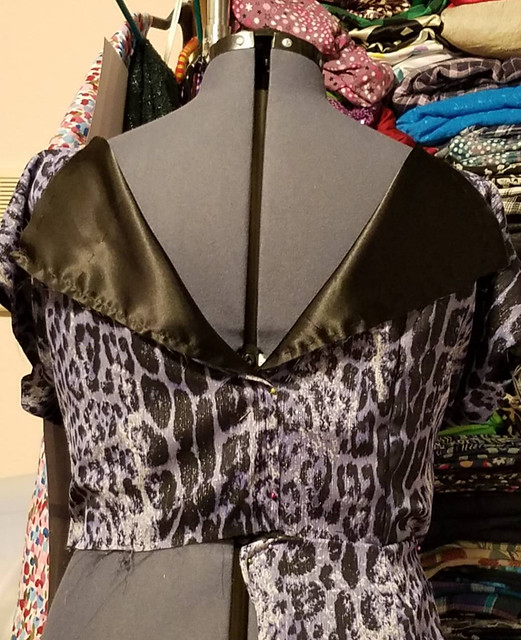
...and the fun side effect of underlining my dress with the shiny side of the charmeuse on the inside meant that the good side showed in the flap that folded out once I unpinned the back. I LOVED IT! So I ran with it. I took out the basting stitches and stitched the two layers together on those edges right sides together and pressed. I finished the skirt, attached it, inserted a shorter zipper and figured out where to insert it where it would cover up my normal bra. I somehow misjudged and had to improvise, because by this time, I was running out of time before I had to pack it up to go to my event and there was no way I was going to unzip that invisible zipper. So I found 3 big, shiny black buttons and added them so that I could close the V a little higher than the zipper did, just to cover up my bra. The top one is the only one that actually does any real work. The other two are only for show. They get a little lost in the pattern, so now that my event is over, I might make some sort of change there. Either use different buttons that stand out more or redo the zipper to be about an inch higher, I'm not sure yet.
But with no further ado, here are the professional photos that I conned the amazing Heather from Maude Productions to take special for me.


I have decided that this is my new favorite dress. It feels amazing to wear. It’s so slippery and nice against my skin. And the fit feels just about as perfect as it gets. I got several compliments on this dress. People are well used to the fact that I often make my own dresses for these things, so the first question is usually, “Did you make this one?” and I was very proud to say “Yes I did!”


Comments
Post a Comment